Friday, February 13, 2015

Nature Bags - Watercolour Paints

I've posted about our nature bags before.  These are bags that we can grab when we are going on a nature walk or somewhere in nature, and we might like to explore things more closely, and sometimes we draw or paint what we see.

In our nature bags we have a small drawing book, paints, a pencil, monoculars (that is, binoculars but with only one barrel, so you look with only one eye - I often find these easier for children, and they are much smaller and lighter to carry around), a loupe (for looking at things more closely), a mini compass, tiny flashlight (smaller then a pen) and a whistle (for safety).  There is also room for a small camera, ipod or phone for taking photos.  Click here to see a bit more detail about the nature bags.

Today I thought I'd put in a bit more detail about our watercolour paints, as we love them and they are just perfect for this purpose, or any other time when you want to take paints on the go.  They are easier to take with us then coloured pencils (although we do sometimes add them to our bags too).

Note about my spelling:  Being Australian, I spell colour - "colour".  I will use this spelling whenever I type the word.  But the brand name of the paints is not spelled that way, so I will write it as it is spelled.  It may look like I'm changing the spelling all the time, but that's why.

The paints we use are Peerless Watercolor paints.  I bought them from http://www.peerlesscolor.com/.  They are watercolour paint on cards.  You wet the paint (using a wet brush) and lovely colours come from them.

http://www.peerlesscolor.com/


I made a palette from watercolour paper, which I print with little squares labelled with all the colour names.  You could do this by hand, but as I had to make a few of these palettes, it was quicker and easier to print them.  The palettes are cut to size so that each palette is made of two watercolour cards that are taped together in the middle, and it will fit nicely inside the back of our sketch books (and moleskine sketchbooks).  Little rectangles of the paint cards are cut and glued (using glue tape) onto the palettes.  Finally, we add a little sample of the colour painted above each little paint rectangle.


You might be able to see that the bottom half of the palette looks a little shiny or reflective.  That's because there is a piece of plastic taped in the middle (so its like a three page book).  This stops the paints mixing and also gives a palette for mixing colours.

The instructions for this, including a youtube video, are from Jane Davenport.  


Along with these paints, we use brushes filled with water, so there is no need to take along a cup for water.  This little tin of pencils and things is what I take.  The kids have a few less and they have spots in their bags for them (I take a few spares).  


We also have a piece of paper towel or a small cloth folded in the back of the book for dabbing the brush on.  

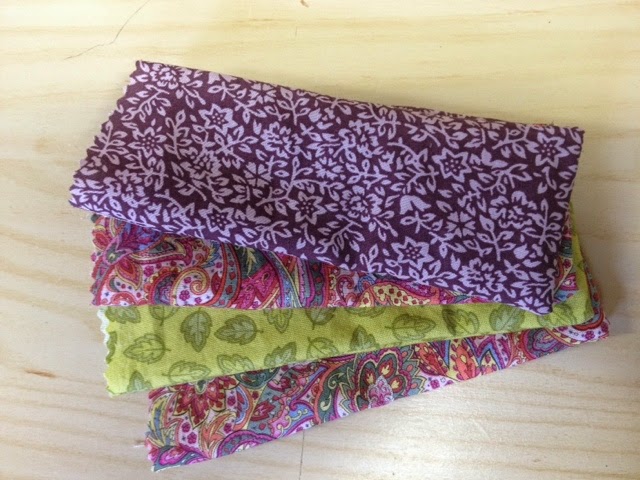
When we go on holidays I take a bag (an old laptop bag) with extra art supplies such as a variety of papers cut to A5 or smaller, watercolour pencils, coloured pencils (Prismacolours) and I take the spare Peerless Watercolor cards, along with scissors and glue tape.  If we use up a colour on our individual palettes, as we often do with shades of green, I can cut another little rectangle and replace it.

Here are a few pictures from my nature book, to show off these lovely paints, but you would do well to look at Jane Davenport's pictures for the lovely colours that she uses.  The pictures are taken with my phone, so could be better quality.


Beach (hopefully that's obvious?) - I wanted the challenge of the different shades of blue in the ocean - still needs lots of practice

A bank covered in flowers leading from grass to beach

Lemon tree - the smudges in the writing are where I've smudged names for online posting
I will try and find some pictures from my children's nature journals to post sometime, but to be honest, they haven't done any for a little while - just looked at things and looked them up.  Hmmm ... better plan a day.

Sunday, February 8, 2015

Brock Magiscope

This is not a post about sewing or about making anything at all.  We have a Brock Magiscope, which is a type of microscope that is super-sturdy, and I know that there are a few people around who are trying to decide what type of microscope to buy for their kids, so I thought I'd post a few pictures here that I've taken through the microscope.  It should give a bit of an idea of the detail that you can get.

For most of these photos I just pointed my camera (an Olympus PEN - like a DSLR) onto the top of the microscope and used auto settings.  Recently I ordered a small part that screws onto the lens that just blocks out outside light - I used that for the catydid photo, but didn't have it for the others.  Most of the time I took a few photos - some worked well, others were not as clear.

First is a little catydid that I found already dead.  I put it into a little plastic box and under the microscrope.  It was about 1 to 1.5 cm long in total.  This is the magnification that comes with the microscope - 40x.

These two are onion cells - just pulling a thin bit of the skin off the onion.  I took these photos over a year ago and of course didn't label them, but I know that I was playing with the highest magnification I could get, so I'm pretty sure that this first picture is at 400x.  The next one was obviously less, but I'm really not sure what.  Perhaps 200x.  I shone a cheap torch in underneath the microscope just to give a little more light then I had in the room which helped.  It was very hard to focus.


This shows yeast that has been left to sponge.  It was something that my daughter did at school, and I googled and googled for more info to know what I was looking at - is it just the air bubbles?  I'm not sure.  Again, at the time I was playing with different magnifications, so unhelpfully, I can't tell you what this is, except that I'm pretty sure it wasn't as high as 400.  I will start to write it down.  Really.

I'll try to take some more to add when I can.  That's all I can find now.

Friday, January 9, 2015

Artwork from yesterday completed

Just wanted to share the end result of the artwork from my children yesterday. The video from artventures.com.au taught them to do two birds, outlined in oil pastels and then painted with watercolours.  Here are their paintings.

From the seven year old:

And from the six year old:

I was hoping they'd get creative with it afterwards though, so left the materials out and gave them another piece of paper each. The six year old continued on to produce two more lovely paintings.

(And by the way, these birds all represent members of our family. The girls have bows.)


Thursday, January 8, 2015

Recipe: Lettuce Wraps

I'm not going to write this out as a formal recipe, as it is more of a quick dinner idea then a recipe, and will depend on what you have available.


Cook whatever veggies you have on hand that you'd like to include - I used 3 small carrots and 2 small zucchinis, cubed, and stir fried them in a little Olive oil until starting to brown.

Now cook the tofu mixture:
INGREDIENTS
Olive oil, as needed
750 g block firm tofu (organic, GE free)
1 tablespoon lemon juice
2 teaspoons good salt
1 teaspoon chopped garlic
Chopped fresh dill if you like - a couple of tablespoons

METHOD
Heat up a good non-stick fry pan or wok. Add a little oil.
Drain any liquid from the tofu (and I usually rinse it then too). Crumble it directly into the heated fry pan. Cook this until some of it starts to go golden. No need to wait for all of it to, but you want to cook it until the texture is a bit chewier, so don't rush this. Let some go brown.
Add the lemon juice, salt, garlic and chopped fresh dill if you have it. Taste and add more salt and lemon if you like. Cook for a little longer, stirring to mix it all well.
Mix in the cooked veggies from earlier and heat it through.


SERVE with iceberg lettuce leaves (or your choice), trying to keep the leaves as big as possible.

Spoon the tofu mixture into lettuce leaves (like San choy bow), wrap up and eat.

We had this with a bowl of chopped salad veg - cucumber, carrot and grape tomatoes, and corn on the cob. The kids added tomato sauce of course!


Christmas Sewing

My little girls sewed Christmas presents for family.


A doll for her sister - using a screen print that I drew and printed a while ago.


No pics of the final product! These were filled with lavender and tied with bows to make lavender bags for quite a few presents. They loved making these because of how simple they were.

They also made some dolls based on a favourite licenced character for their brother.  These were very complicated and turned out beautifully. (Hoping it is okay to post these pics. They have not been made for sale, and are not taken from any specific picture. The pattern was just drawn freehand.)


My son made cotton pajama shorts for each of his three sisters.

I'm very proud of them all for developing the skills and taking the time to make these gifts.


Art Time

We are having a try at the free "art" lessons on artventure.com.au. Here is painting in progress.


Gluten free Bread


Just made a loaf of gluten free bread from the recipe at www.glutenfreecookingschool.com - best gluten free bread I've ever tried. It's definitely worth visiting this site, owned by Mary Francis Pickett, if you are interested in gluten free cooking.

The loaf has a great texture - I've just tried it untoasted with butter and vegemite and it is certainly up to that. I'm very interested to see what it will be like in a few hours.

Australians note - she does use some tablespoon measurements. US tablespoons are 15 ml and Australian ones are 20 ml. Check where your measuring spoons are from, or just use three teaspoons (from the measuring spoon set). One of the tablespoon measurements is for yeast, and you really don't need an extra 5 ml of yeast.